
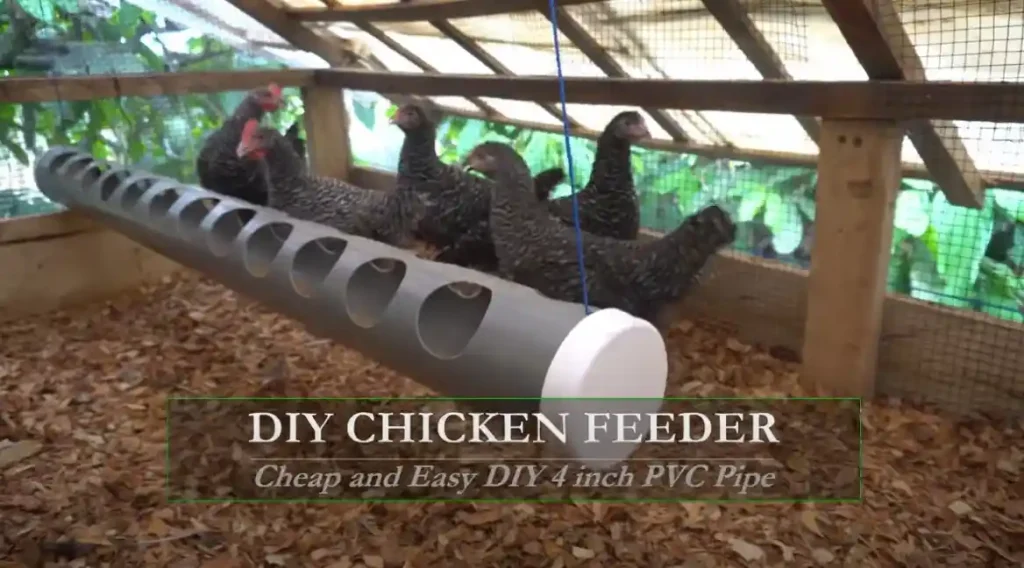
Keeping chickens can be a rewarding and enjoyable experience, but ensuring they have access to clean and easily accessible food is essential. This comprehensive guide will explore the world of DIY chicken feeders made from PVC pipes. PVC feeders are popular among poultry enthusiasts due to their durability, affordability, and ease of construction. Follow along as we delve into the step-by-step process of creating your DIY chicken feeder using PVC pipes.
For those interested in building a cozy home for their chickens, consider incorporating ideas from our article on the benefits of a ‘Diy pallet chicken coop’ to provide your feathered friends with a comfortable and sustainable living space.
Table of Contents
- Materials Needed:
- Step-by-Step Instructions:
- FAQs (Frequently Asked Questions):
- Q: How much does it cost to make a DIY chicken feeder using PVC pipes?
- Q: Can PVC chicken feeders withstand outdoor weather conditions?
- Q: Are there any specific care and maintenance requirements for PVC chicken feeders?
- Q: Can I customize the design of my PVC chicken feeder?
- Q: Will the PVC material affect the quality of the chicken feed?
- Q: Can PVC chicken feeders attract pests or rodents?
- Q: Are there any additional tips for optimizing the use of a PVC chicken feeder?
- Conclusion:
Materials Needed:
To get started on your DIY chicken feeder project, gather the following materials:
- PVC pipes (4-inch diameter)
- PVC elbows and connectors
- PVC glue
- Measuring tape
- Hacksaw or PVC pipe cutter
- Sandpaper (medium grit)
- Drill with a hole saw attachment
- Chicken feeder attachment (optional)
- PVC end caps
- Wire or chain (for hanging)
Step-by-Step Instructions:
1. Measure and Cut the PVC Pipes

Begin by measuring and cutting the PVC pipes to the desired length. The length will depend on the chickens you have and the feed you wish to provide. A good starting point is around 12-18 inches per chicken. Use a hacksaw or PVC pipe cutter to make clean, precise cuts.
2. Smooth the Edges
After cutting the pipes, use sandpaper to smooth any rough edges or burrs. This step will prevent injuries to your chickens and ensure a neat finish.
3. Drill Holes for Feeding Openings
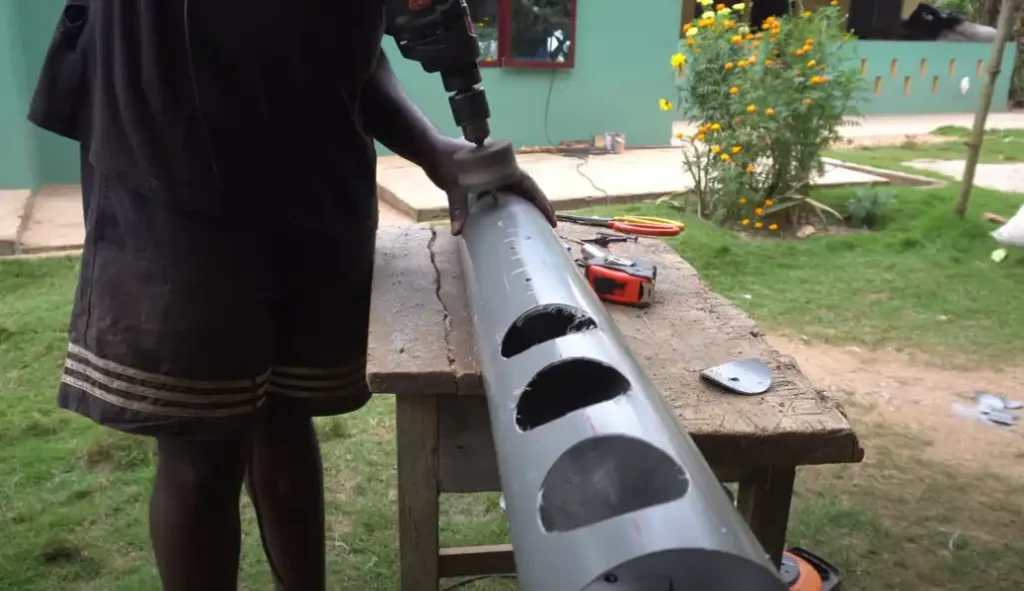
Next, determine the location and size of the feeding openings on the PVC pipes. Using a drill with a hole saw attachment, carefully create holes that are large enough for the chickens to access the feed but small enough to prevent excessive spillage. Aim for holes approximately 2-3 inches in diameter.
4. Assemble the Feeder
Take the PVC pipes, elbows, and connectors and assemble the feeder. Apply PVC glue to the joints for added stability. Connect the pipes, creating a design that suits your space and the number of chickens. Consider creating a T-shape or a vertical design depending on your specific needs.
5. Optional Feeder Attachment
For added convenience, you can attach a chicken feeder to the bottom end of the PVC pipe. This attachment will ensure a steady feed flow into the PVC feeder, minimizing wastage and making feeding easier for you and your chickens.
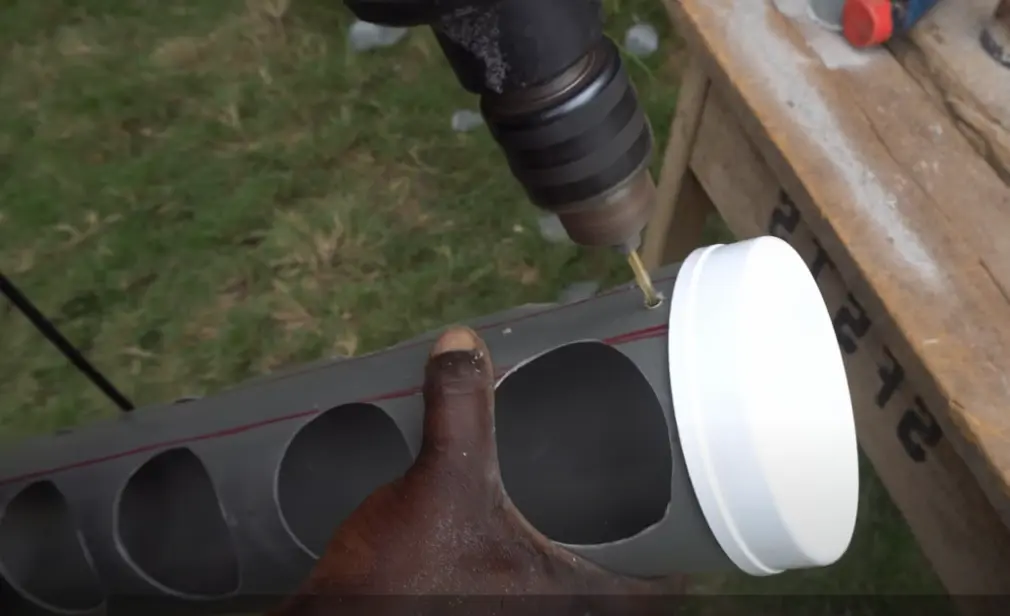
6. Secure and Hang the Feeder
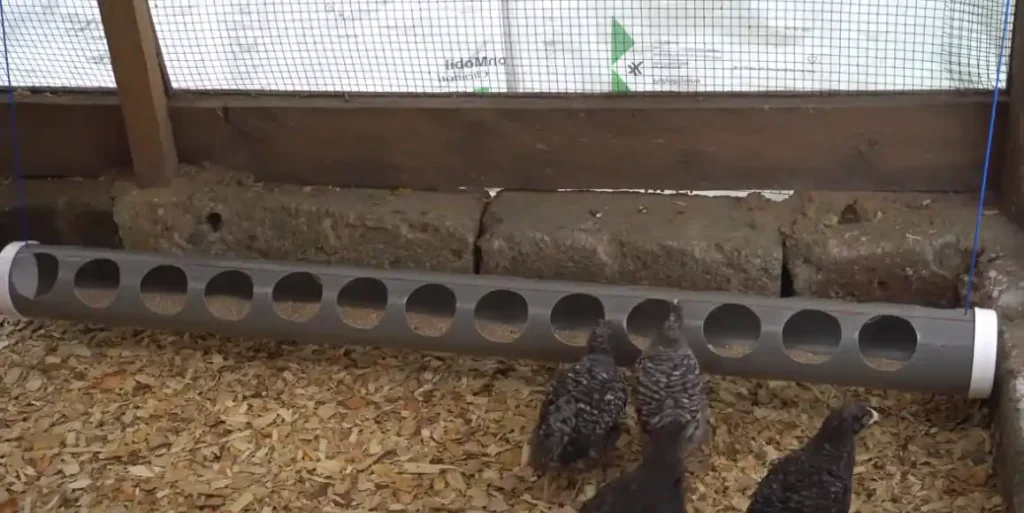
Once the feeder is fully assembled, attach PVC end caps to both ends to prevent feed spillage. Then, using wire or chain, secure the feeder within the chicken coop or run it at an appropriate height. Ensure it is easily accessible to the chickens while keeping it elevated to avoid contamination.
FAQs (Frequently Asked Questions):
Q: How much does it cost to make a DIY chicken feeder using PVC pipes?
A: The cost of materials for a PVC chicken feeder can vary depending on the size and complexity of your design. You can expect to spend around $20-$30 on average for the required PVC pipes and fittings.
Q: Can PVC chicken feeders withstand outdoor weather conditions?
A: Yes, PVC feeders are known for their durability and ability to withstand outdoor conditions. However, it’s a good idea to periodically check the feeder for any signs of wear or damage and make necessary repairs or replacements.
Q: Are there any specific care and maintenance requirements for PVC chicken feeders?
A: PVC chicken feeders are relatively low-maintenance. Regularly inspect the feeder for any clogs or blockages, and clean it as needed to ensure proper functionality. Additionally, check the hanging mechanism to ensure it remains secure and stable. Protecting the feeder from direct sunlight is also recommended, as prolonged exposure to UV rays can degrade the PVC material over time.
Q: Can I customize the design of my PVC chicken feeder?
A: Absolutely! One of the advantages of DIY PVC feeders is the flexibility to customize the design according to your specific needs. You can adjust the length, number of feeding openings, and overall structure to accommodate the size of your flock and the available space in your coop or run.
Q: Will the PVC material affect the quality of the chicken feed?
A: PVC is considered a safe and inert material that does not interact with or contaminate the chicken feed. However, it’s essential to use food-grade PVC pipes and fittings to ensure the highest safety level and avoid potential health risks.
Q: Can PVC chicken feeders attract pests or rodents?
A: When properly designed and maintained, PVC feeders can help minimize the risk of attracting pests or rodents. Ensure that the feeder is securely hung and that there are no gaps or openings that could allow access to the feed. Additionally, regularly clean the feeder to remove any food residue that might attract unwanted visitors.
Q: Are there any additional tips for optimizing the use of a PVC chicken feeder?
A: To enhance the functionality of your PVC chicken feeder, consider placing it in a sheltered area within the coop or run to protect the feed from rain or excessive moisture. Additionally, monitor the feed levels regularly to ensure an adequate supply for your chickens.
Conclusion:
Creating a DIY chicken feeder using PVC pipes is an excellent way to provide a cost-effective and efficient feeding solution for your poultry. By following the step-by-step instructions outlined in this guide, you can construct a durable and customizable feeder that meets the specific needs of your flock. Remember to consider the number of chickens, the desired amount of feed, and the available space when designing your PVC feeder. With some creativity and minimal investment, you can enhance your chicken-keeping experience and ensure your feathered friends always have access to their meals. Happy feeding!


