

Are you an avid shooter looking for a reliable and convenient shooting bench? Look no further! This guide walks you through building your own DIY shooting bench. Whether you’re a seasoned marksman or just starting out, having a sturdy and well-designed shooting bench can significantly enhance your shooting experience. So, roll up your sleeves, grab your tools, and let’s dive into this exciting project!
Table of Contents
- Materials and Tools
- Step 1: Planning and Design
- Step 2: Cutting and Preparing the Lumber
- Step 3: Assembling the Base
- Step 4: Building the Benchtop and Seats
- Step 5: Adding Bracing and Reinforcement
- Step 6: Finishing Touches
- FAQs
- Q: Can I adjust the dimensions of the shooting bench to suit my specific needs?
- Q: What type of finish is recommended for the shooting bench?
- Q: Can I use different types of wood for this project?
- Q: Is adding adjustable components to the shooting bench possible?
- Q: Can I make the shooting bench portable?
- Conclusion
Materials and Tools
Before we jump into the construction process, let’s gather all the materials and tools you’ll need:
Materials:
- 4×4 pressure-treated lumber
- 2×6 pressure-treated lumber
- 2×4 pressure-treated lumber
- Plywood
- Wood screws
- Lag bolts
- Wood glue
- Weather-resistant finish
Tools:
- Circular saw
- Drill
- Screwdriver
- Measuring tape
- Carpenter’s square
- Clamps
- Sandpaper
- Paintbrush
Step 1: Planning and Design
To kick off your DIY shooting bench project, it’s essential to plan and design the bench to suit your needs. Consider factors such as size, height, and stability. Sketch out the bench’s dimensions and layout, considering your shooting preferences and the available space. Think about the number of shooters you expect to accommodate and if you want any additional features like storage or adjustable components. This planning stage will ensure that your shooting bench meets your specific requirements.
Step 2: Cutting and Preparing the Lumber
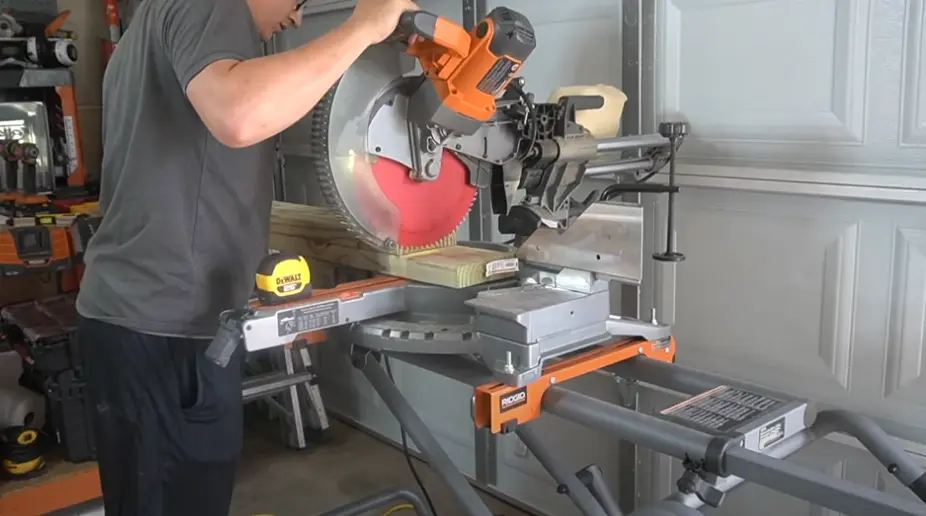
Once the design is finalized, it’s time to cut and prepare the lumber. Use a circular saw to cut the 4×4 lumber into four equal legs of your desired height. Remember to measure twice and cut once to ensure accurate dimensions. Next, cut the 2×6 lumber into several pieces for the benchtop, seats, and support braces. Finally, cut the 2×4 lumber into smaller pieces for additional bracing and reinforcement. Double-check your measurements and ensure that all pieces are cut to the proper length.
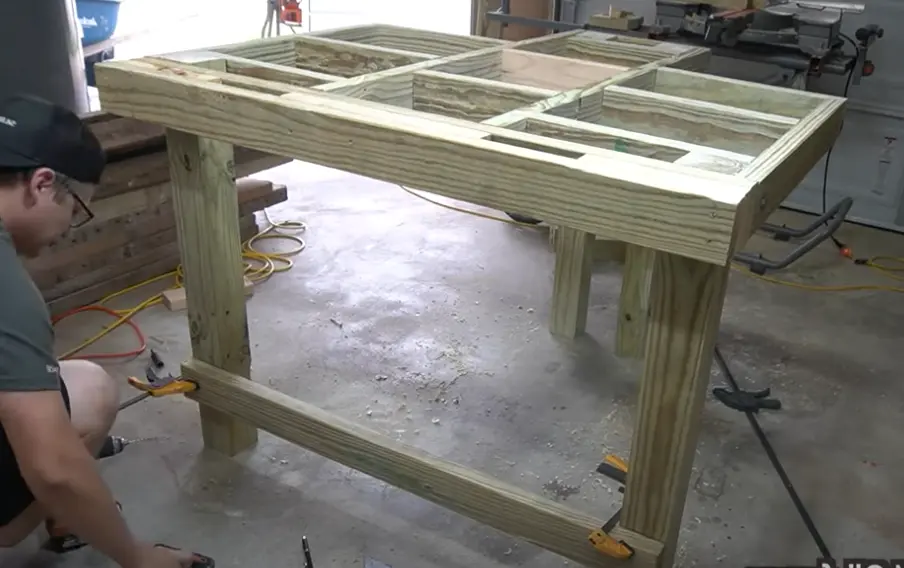
Step 3: Assembling the Base
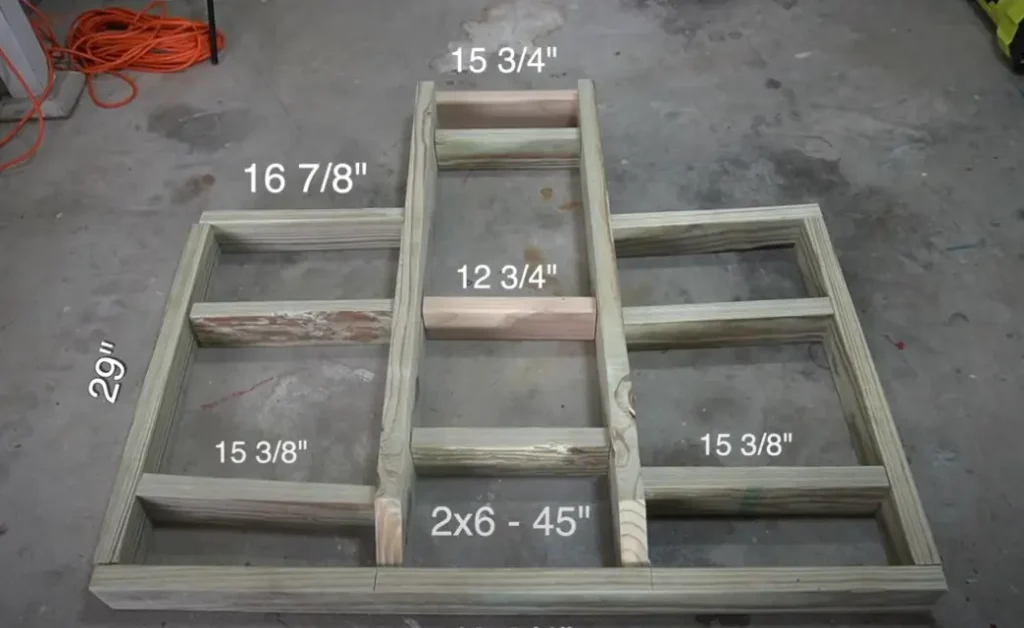
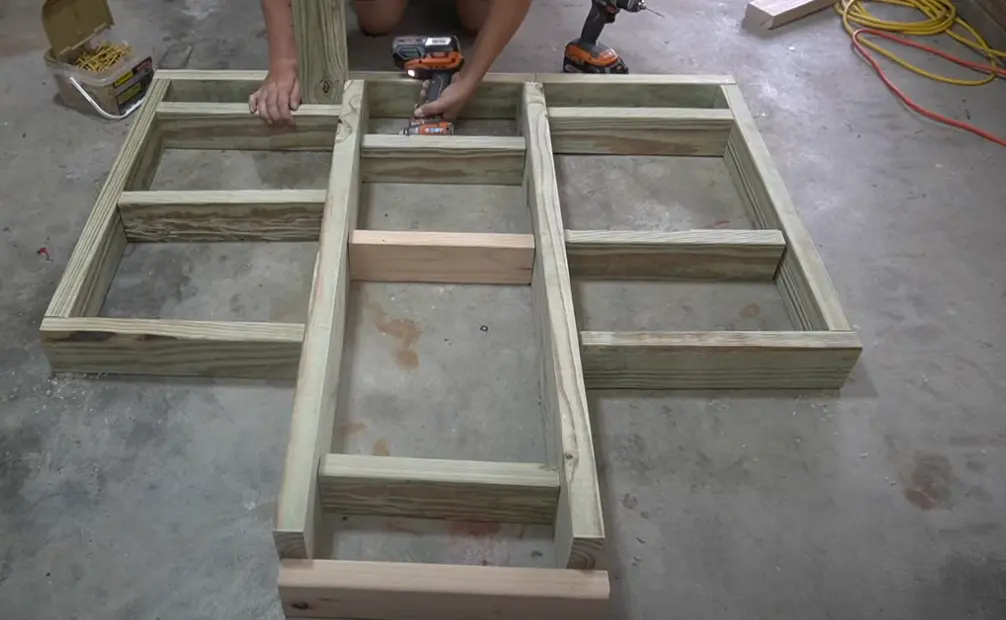
With the lumber prepared, it’s time to assemble the base of your shooting bench. Start by attaching the legs to the bench’s frame using wood screws and wood glue for a secure and sturdy connection. Ensure that the legs are evenly spaced and square with the frame. Use a carpenter’s square to check for right angles. Once the legs are attached, add support braces between the legs to provide additional stability and rigidity to the shooting bench.
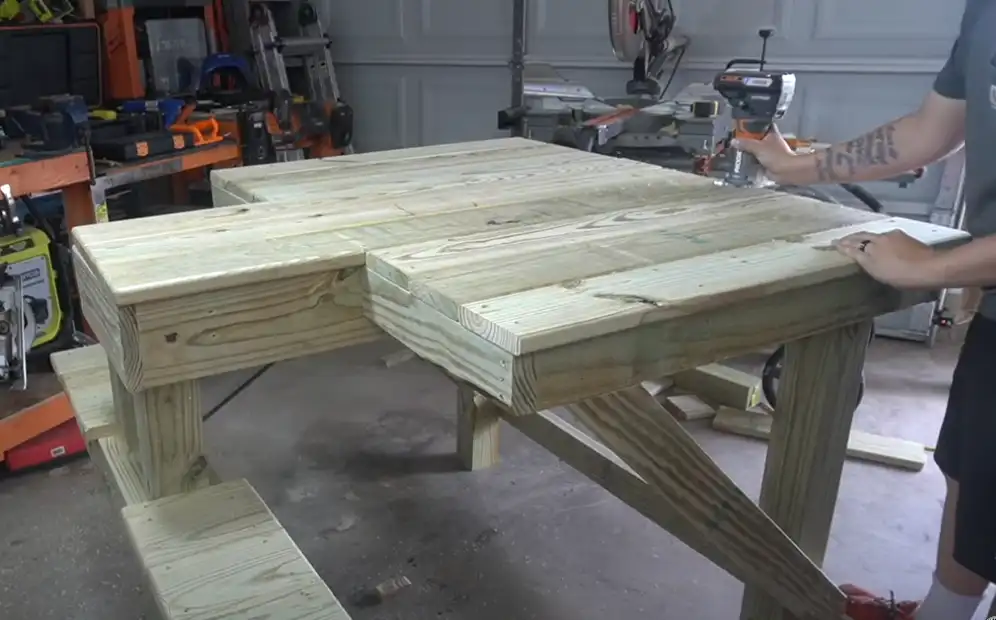
Step 4: Building the Benchtop and Seats

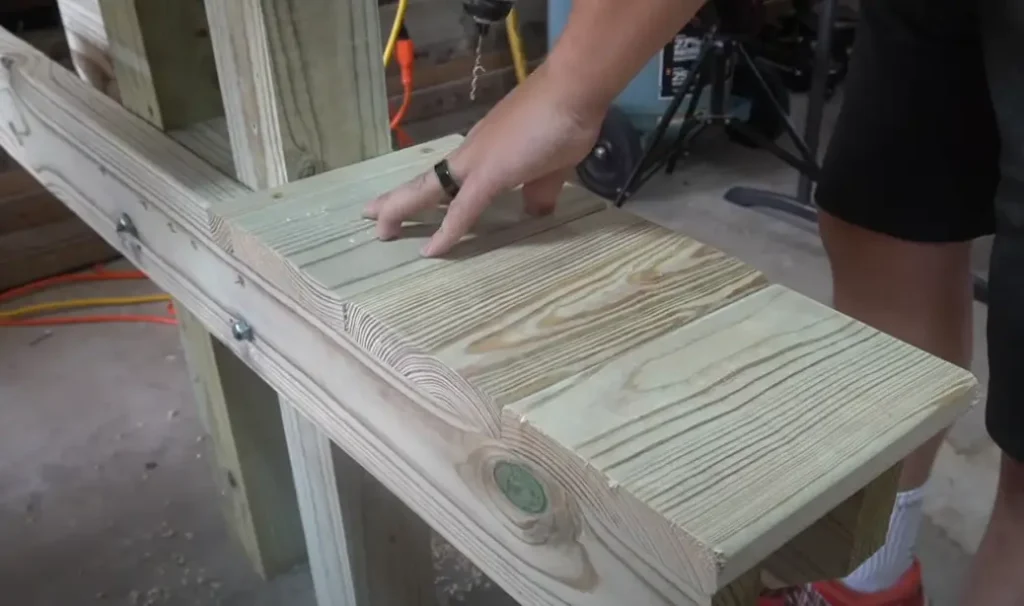
Next, it’s time to construct the benchtop and seats. Lay out the prepared 2×6 lumber pieces on the frame, ensuring they fit snugly and align properly. Use screws and wood glue to secure the boards together, creating a solid and stable surface for shooting. Consider adding a center support brace under the benchtop for added strength, especially if you plan on placing heavy equipment or rifles on the shooting bench.
Step 5: Adding Bracing and Reinforcement

To reinforce the shooting bench’s overall structure:
- Add additional bracing using the cut 2×4 lumber.
- Attach the braces diagonally across the legs and under the benchtop for increased stability.
- Securely fasten them using screws, ensuring a tight connection.
These braces will help distribute the weight evenly and minimize any wobbling or movement while shooting.
Step 6: Finishing Touches
With the shooting bench’s construction complete, it’s time to add the finishing touches. Start by sanding down any rough edges or surfaces using sandpaper. This will ensure a smooth and splinter-free shooting experience. Pay attention to areas where shooters may come into contact with the bench, such as the edges of the benchtop and seats.
After sanding, apply a weather-resistant finish to protect the shooting bench from the elements. Consider using a polyurethane sealant or outdoor paint specifically designed for wood. This finish will enhance the bench’s appearance and provide an added layer of protection against moisture, UV rays, and other environmental factors.
If desired, you can add some personal touches to your shooting bench. Consider painting it in your favorite colors or adding decals or stickers that reflect your shooting interests or unique style. Just make sure that the finishes and decorations you choose are durable and won’t interfere with the functionality of the bench. For More Information Click Here.
FAQs
Q: Can I adjust the dimensions of the shooting bench to suit my specific needs?
A: Absolutely! Feel free to customize the dimensions of the shooting bench according to your requirements. Just ensure that any alterations you make maintain stability and functionality.
Q: What type of finish is recommended for the shooting bench?
A: Opt for a weather-resistant finish, such as polyurethane or outdoor paint, to protect the bench from moisture and other environmental factors.
Q: Can I use different types of wood for this project?
A: While pressure-treated lumber is recommended for its durability, you can experiment with other wood types as long as they are suitable for outdoor use and can withstand the elements. Keep in mind that different woods may require different finishing techniques.
Q: Is adding adjustable components to the shooting bench possible?
A: Yes, if you want to have adjustable features on your shooting bench, consider incorporating mechanisms such as hinges or clamps that allow you to change the angle or height of specific parts. This can add versatility to your shooting setup.
Q: Can I make the shooting bench portable?
A: While this DIY shooting bench is not specifically designed for portability, you can make modifications to enhance its mobility. Consider adding wheels or easily disassembling the bench for transportation to different shooting locations.
Conclusion
Congratulations! You’ve successfully built your very own DIY shooting bench from scratch. Following the step-by-step instructions in this guide, you now have a sturdy, practical, and customized shooting bench to enhance your shooting experience.
Safety should always be a top priority when using your shooting bench. Ensure that you follow all appropriate safety guidelines and local laws regarding shooting activities. Always use caution and practice responsible firearm handling.
Now it’s time to take advantage of your new shooting bench. Set your targets, aim, and enjoy the stability and comfort it provides. With your DIY shooting bench, you can refine your shooting skills and create lasting memories on the range.
So, gather your gear, head to the shooting range, and make the most of your DIY shooting bench. Happy shooting!


