

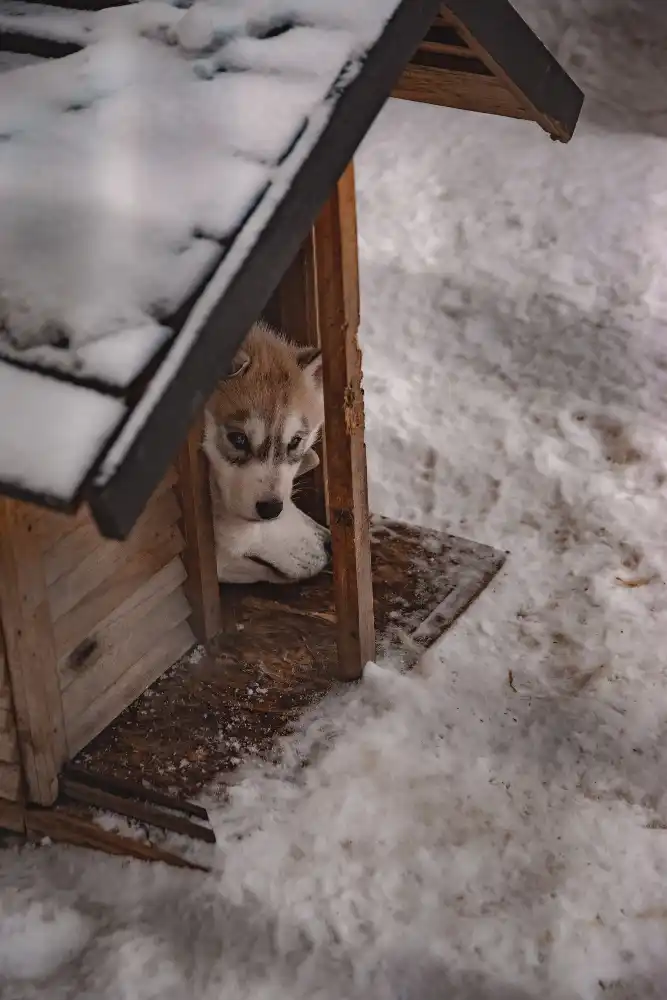
Woof! Welcome to the ultimate guide on creating your very own DIY outdoor dog kennel – a pawsitively fantastic project that’ll have your canine companion wagging their tail with joy! Whether you have a rambunctious retriever or a tiny terrier, a Dog kennel provides a safe and cozy space for your four-legged friend to enjoy the great outdoors while staying secure and comfortable.
Table of Contents
- Why an Outdoor Dog Kennel is the Bee’s Knees
- Planning for Pawsome Success
- Designing the Ultimate Doggie Digs
- Materials and Tools: Fetching Supplies for a Wag-tastic Kennel
- Building Your DIY Outdoor Dog Kennel
- Landscaping and Doggone Beautification
- Health and Hygiene: Keeping the Kennel Fresh as a Daisy
- Keeping Your Dog Comfortable and Entertained
- Weatherproofing Your DIY Outdoor Dog Kennel
- FAQ: Paw-some Questions and Helpful Answers
- Q: What size should the DIY outdoor dog kennel be?
- Q: How can I make the kennel escape-proof?
- Q: What materials are best for the kennel floor?
- Q: How do I keep the kennel clean and odor-free?
- Q: Can I use recycled materials for building the kennel?
- Q: What safety measures should I take during construction?
- Q: How can I protect my dog from extreme weather conditions?
- Q: Are there any eco-friendly options for the kennel?
- Conclusion: Building Memories, One Wag at a Time
Why an Outdoor Dog Kennel is the Bee’s Knees
Before we dive into the nitty-gritty, let’s yap about why an outdoor dog kennel is such a barking good idea! Having a designated outdoor space for your furry friend offers a myriad of benefits. First and foremost, it gives your pooch the freedom to stretch their legs, soak up the sun, and relish nature’s beauty. It also keeps them safe from potential hazards, prevents them from wandering off, and maintains your peace of mind knowing they’re safe and sound.
Planning for Pawsome Success
First things first, let’s start planning this grand adventure! Grab your leash and follow these steps:
Step 1: Understand Your Dog’s Needs
Before hammering nails, consider your pup’s size, breed, and personality. Larger breeds might need more room to roam, while small doggos might appreciate a cozy nook. Don’t forget to take into account their favorite activities, like zoomies or sunbathing. Tailor the kennel to fit their needs paw-fectly!
Step 2: Pick the Paw-fect Spot
Location, location, location! Find a spot in your yard that provides ample shade, especially during hot summer days, and is protected from strong winds and heavy rain. Your fur baby will thank you for creating a cool and cozy hideout.
Step 3: Bark up the Right Tree
Check with your local authorities about any zoning or building codes that may affect your DIY project. We want everything to be pawsitive and legal!
Step 4: Budget and Materials
Just like a treat jar, set aside a budget for your kennel project. Then, fetch suitable materials, like wood, metal, or plastic, based on your furry friend’s needs and your DIY skills. Consider eco-friendly options if you want to help Mother Earth!
Designing the Ultimate Doggie Digs
Now comes the tail-wagging fun part – designing your outdoor dog kennel! Let your creativity run wild like a Zoomie session at the park!
Step 1: Size Matters, Folks!
Size matters, but in this case, bigger isn’t always better! Your doggo needs enough space to move around, but a kennel that’s too large might feel overwhelming. Measure twice, build once!
Step 2: Tail-Wagging Styles
It’s time to decide on the style of your kennel. From simple box kennels to luxurious palaces, choose the one that matches your dog’s personality and your yard’s aesthetics.
Step 3: Building Blocks of Bliss
The flooring, roofing, and walls are the building blocks of your dog’s sanctuary. Opt for dog-friendly materials that are easy to clean and provide comfort.
Step 4: The Grand Entrance
Adding gates and doors to your kennel is like installing a welcome mat for your pooch. Make sure they’re secure so Houdini doesn’t pull a disappearing act!
Step 5: Let There Be Shade
We all enjoy some shade on a sunny day, and your dog is no exception. Add some shelter to the kennel to protect your pet from the elements.
Phew! That was a lot of work, but we’re not done yet! In the next section, we’ll dig deeper into the materials and tools you’ll need for this paw-some project! Stay tuned, folks!
Materials and Tools: Fetching Supplies for a Wag-tastic Kennel
Now that we’ve got the design on paper, it’s time to fetch the materials and tools to turn that vision into reality! From tail to tip, we’ll guide you through this journey!
Step 1: The Best Building Materials
Just like we prefer high-quality treats, your furry friend deserves the best! Choose sturdy and pet-safe materials for the kennel’s frame, walls, and roof. Pressure-treated wood or weather-resistant metal are paw-some options that can withstand the elements.
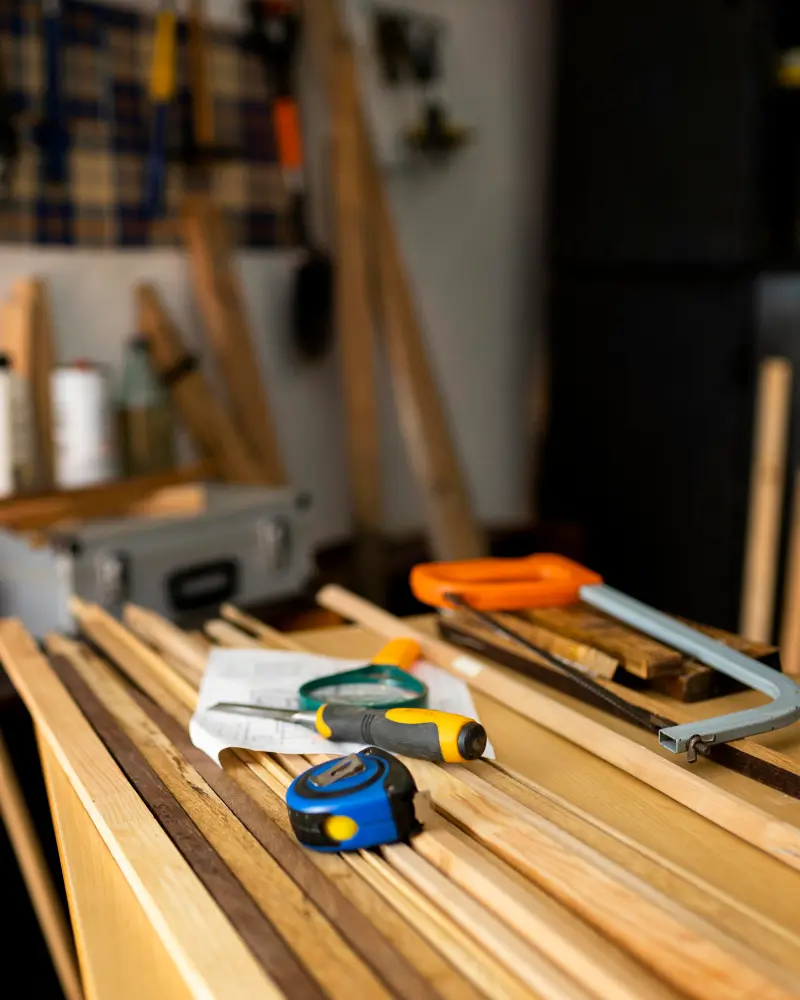
Step 2: Handy-Dandy Tools
No builder is complete without their trusty tools! Get ready to unleash the power of hammers, saws, drills, and measuring tapes. Don’t worry if you’re not a DIY pro; simple tools like screwdrivers can work wonders too!
Step 3: Eco-Friendly Alternatives
If you’re an Earth-loving pet parent, consider using eco-friendly building materials. Recycled plastics or reclaimed wood can give your kennel a paw-sitive environmental impact. It’s a win-win for your pooch and the planet!
Building Your DIY Outdoor Dog Kennel
It’s hammer time! Now that we have everything we need, it’s time to roll up those sleeves and start building your dog’s dream house!
Step 1: Preparing the Ground
Start by clearing the area and leveling the ground. Just like a smooth belly rub, a flat surface will ensure a stable and comfortable foundation.
Step 2: Assembling the Frame
With your materials and tools ready, begin constructing the frame according to your kennel’s design. A little teamwork can make this part a whole lot easier!
Step 3: Walls and Flooring
Attach the walls and flooring securely to the frame. Use materials that are easy to clean to keep your pup’s digs fresh and tidy.
Step 4: Raising the Roof
Time to raise the woof… I mean the roof! Add the sheltering roof to protect your pooch from the elements and keep them dry during rain showers.
Step 5: Gates and Doors
Install the gates and doors with love and care. Make sure they close securely to keep your pup safe and sound inside their kingdom.
Landscaping and Doggone Beautification
Now that your dog’s palace is up let’s spruce up the surroundings! We want this outdoor haven to be the bark of the town!
Step 1: Dog-Friendly Landscaping
Bring nature closer to your furry friend with dog-safe plants and landscaping. It’s like their own mini-park where they can explore and enjoy the scents!
Step 2: Creating a Cozy Spot
Add some plush bedding or a comfy doghouse inside the kennel. Your furry friend will have a cozy spot to retreat to when they need a little “me time.”
Step 3: Drainage Solutions
We don’t want any soggy paws! Ensure proper drainage around the kennel to keep the area dry and free from puddles during rainy days.
Health and Hygiene: Keeping the Kennel Fresh as a Daisy

Just like a good belly scratch, keeping the kennel clean is essential for your dog’s health and happiness!
Step 1: Regular Cleaning
Make it a habit to clean the kennel regularly. Remove any waste, change the bedding, and wipe down the surfaces to keep it fresh and odor-free.
Step 2: Pet-Safe Cleaning Products
When using cleaning products, opt for pet-safe options. Some chemicals can be harmful to your furry friend, so choose wisely!
Step 3: Parasite Prevention
Protect your dog from pesky parasites like fleas and ticks. Regularly inspect and treat your pup for a pest-free and itch-free experience.
Keeping Your Dog Comfortable and Entertained

Your pup’s comfort and happiness are a top priority! Let’s make their stay in the kennel a tail-wagging delight!
Step 1: Doggie Comforts
Provide a cozy bed, fresh water, and a few favorite toys inside the kennel. It’ll feel like a five-star resort for your fur baby!
Step 2: Ample Shade and Water
Ensure enough shade and water is always available, especially during hot days. Keeping your pup hydrated and cool is key to a happy and healthy tail-wagger.
Step 3: Playtime Opportunities
No kennel is complete without some playtime! Set aside time each day to bond and play with your furry friend. It’s a great way to strengthen your bond and stimulate them mentally and physically!
Weatherproofing Your DIY Outdoor Dog Kennel
Rain or shine, we want your furry friend to stay snug as a bug in their kennel!
Step 1: Winterization Tips
When winter comes knocking, add extra insulation and bedding to keep your pup warm and toasty during the chilly days and nights.
Step 2: Summer Cooling Solutions
Help your furry pal beat the heat by adding fans or providing access to a shaded area during scorching summer days.
Step 3: Rain and Storm Precautions
Prepare for rainy days with weatherproof roofing and raised flooring to prevent flooding inside the kennel.
FAQ: Paw-some Questions and Helpful Answers
Q: What size should the DIY outdoor dog kennel be?
A: The size of the kennel depends on the size and needs of your dog. Generally, it should be spacious enough for them to stand, lie down, and move comfortably.
Q: How can I make the kennel escape-proof?
A: Ensure the gates and doors are secure and that there are no gaps or holes in the walls or flooring. Supervise your dog while in the kennel to prevent escape attempts.
Q: What materials are best for the kennel floor?
A: Materials like concrete, gravel, or rubber flooring are durable and easy to clean, making them great options for the kennel floor.
Q: How do I keep the kennel clean and odor-free?
A: Regularly clean the kennel, remove waste promptly, and use pet-safe cleaning products. Washing bedding and toys regularly can also help keep it fresh.
Q: Can I use recycled materials for building the kennel?
A: Absolutely! Using recycled materials is eco-friendly and can be just as sturdy and functional as new ones.
Q: What safety measures should I take during construction?
A: Wear appropriate safety gear like gloves and goggles. Take your time and follow instructions carefully to avoid accidents.
Q: How can I protect my dog from extreme weather conditions?
A: Provide ample shade, water, and bedding for both hot and cold weather. Consider adding insulation or cooling fans for extreme temperatures.
Q: Are there any eco-friendly options for the kennel?
A: Yes, you can use eco-friendly materials like reclaimed wood or recycled plastics for a greener option.
Conclusion: Building Memories, One Wag at a Time
Congratulations on creating a woof-tastic DIY outdoor dog kennel! Your furry friend now has a special place to call their own, where they can play, relax, and enjoy the great outdoors while staying safe and sound.
As you watch your pup happily explore their new outdoor haven, you’ll feel a sense of pride and accomplishment, knowing you’ve provided them with a loving and secure space. This DIY project strengthens the bond between you and your dog and contributes to their overall well-being and happiness.
Remember, just like us, dogs thrive in an environment that caters to their needs and preferences. Keep an eye on your furry friend as they adjust to their new space. Observe their reactions and make any necessary adjustments to ensure their comfort and safety.
But it doesn’t stop here! Your DIY outdoor dog kennel offers endless opportunities for customization and improvement. Add fun and engaging features like agility obstacles or digging pits, and consider planting more dog-friendly vegetation to create an even more inviting atmosphere.
Now that you’ve mastered the art of building a dog paradise, why not share your expertise with fellow pet parents? You can inspire them to create their own outdoor dog havens and provide a safe and loving environment for their furry pals as well.
So go ahead, unleash your creativity, and let the tail-wagging adventures continue! With your DIY prowess and your pup’s excitement, there’s no limit to the memories you’ll create together in this wonderful outdoor oasis.
Now, get out there and play fetch, go on long walks, and enjoy the beauty of nature with your best friend by your side. Happy building and tail-wagging!


