

Are you an avid archer looking to improve your skills? Setting up a DIY archery backstop can be a game-changer for your practice sessions. Whether you shoot in your backyard or have a dedicated archery range, having a proper backstop enhances safety. It saves your arrows from getting lost or damaged. In this comprehensive guide, we will walk you through the process of creating a sturdy and efficient archery backstop using easily accessible materials. Get ready to take your archery experience to the next level!
Table of Contents
Materials Needed:
Before diving into the construction process, let’s gather the materials required to build your DIY archery backstop:
- Tarpaulin or heavy-duty fabric
- Wooden frame (2×4 lumber or PVC pipes)
- Bungee cords or zip ties
- Sandbags or pea gravel
- Eyelets or grommets
- Hammer or drill
- Scissors or utility knife
- Measuring tape
- Marker or chalk
Step-by-Step Guide:
Step 1: Planning and Preparation
To begin, choose a suitable location for your archery backstop. Consider factors like space availability, safety precautions, and any local regulations regarding archery practice. Once you’ve identified the spot, gather all the necessary materials and tools.
Step 2: Constructing the Frame
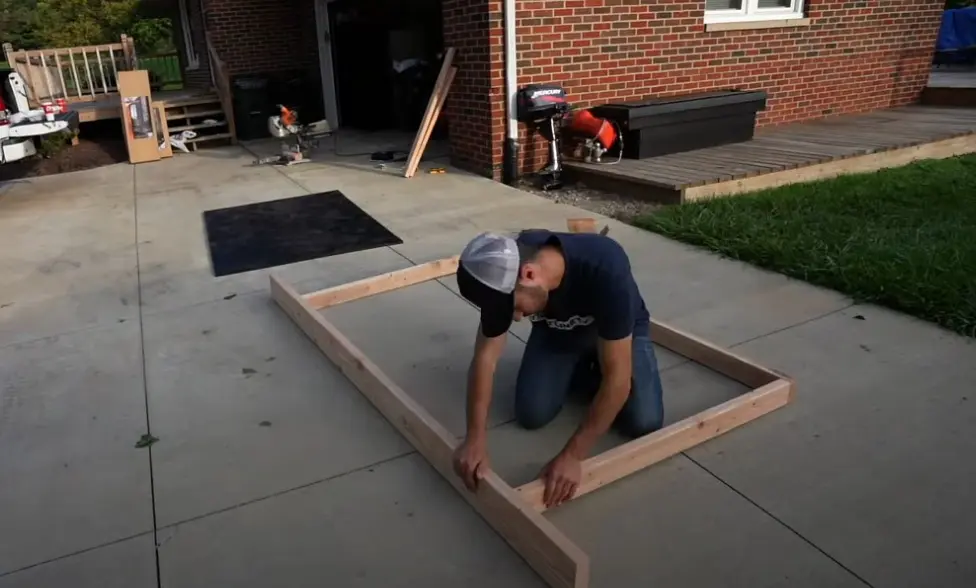
Start by building the frame for your backstop. You can either use 2×4 lumber or PVC pipes for this purpose. Measure and cut the pieces according to your desired dimensions, keeping in mind the size of your shooting range. Assemble the frame securely using screws, nails, or fittings, ensuring it stands firm and stable.
Step 3: Attaching the Tarpaulin
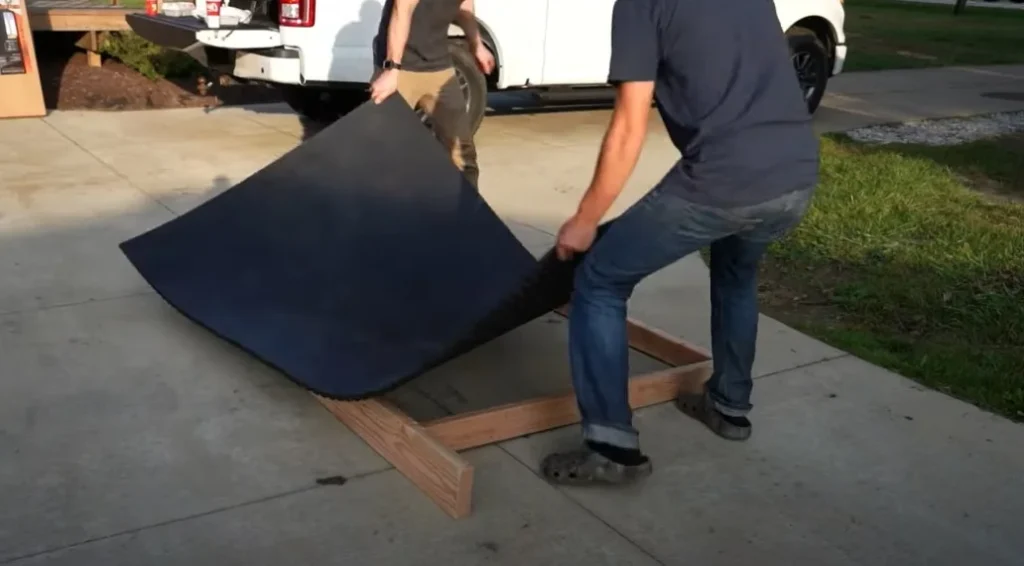

Spread out the tarpaulin or heavy-duty fabric on the ground behind the frame. Align it properly and fasten it securely using bungee cords or screws. Ensure the tarpaulin covers the entire structure without gaps or loose areas. This will prevent arrows from penetrating through the backstop.
Step 4: Reinforcing the Backstop
To enhance your backstop’s durability and stopping power, reinforce it with additional layers. Attach sandbags or fill the bottom section with pea gravel for extra resistance. This will help absorb the impact of the arrows and prevent them from bouncing back.
Step 5: Installing Eyelets or Grommets
To easily hang the backstop or secure it to a structure, install eyelets or grommets along the edges of the tarpaulin. Use a hammer or drill to create holes and insert the eyelets/grommets. These will allow you to attach ropes or hooks for hanging or securing the backstop as needed.
Step 6: Testing and Adjusting
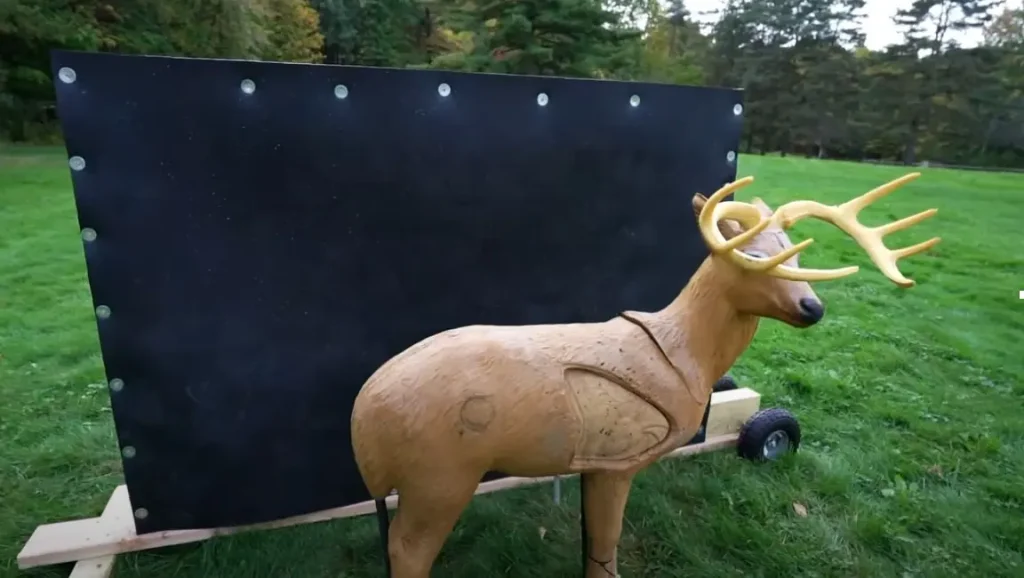
Once the backstop is assembled, it’s time to test its effectiveness. Stand at a suitable distance and shoot a few arrows to ensure the backstop safely stops them. If needed, make adjustments, such as adding more layers of fabric or sandbags to enhance it’s stopping power.
Frequently Asked Questions (FAQs):
Q1: Can I use a different material instead of tarpaulin for the backstop?
A1: Absolutely! While tarpaulin is commonly used due to its durability, you can explore alternatives such as ballistic nylon or canvas for your backstop. Just ensure that the material you choose has sufficient strength and thickness to withstand the impact of arrows.
Q2: How far should I stand from the backstop while shooting?
A2: The ideal shooting distance depends on your bow’s draw weight and skill level. As a general guideline, start with a distance of 10 to 15 yards and gradually increase it as you become more proficient. Always prioritize safety and maintain a safe shooting distance according to your shooting ability.
Q3: Can I make the backstop portable?
A3: Yes, you can make the backstop portable by using a lightweight frame made of PVC pipes and ensuring that the tarpaulin is easily detachable. This way, you can disassemble and conveniently transport the backstop to different locations.
Q4: How do I maintain the backstop for long-lasting use?
A4: Regular maintenance is essential to extend the lifespan of your backstop. Inspect the tarpaulin for any signs of wear or tear and repair or replace it as needed. Additionally, check the frame for stability and make any necessary adjustments. Store the backstop in a dry area when not in use to prevent moisture damage.
Q5: Can I customize the backstop design?
A5: Absolutely! Feel free to get creative with the design of your DIY archery backstop. You can paint the frame or add decorative elements to personalize it according to your preferences. Just ensure that any modifications you make do not compromise the safety or functionality of the backstop
Conclusion:
Building your DIY archery backstop is an excellent way to enhance your archery practice sessions and ensure safety for yourself and others. Following the step-by-step guide in this article, you can create a sturdy backstop using readily available materials. Remember to prioritize safety precautions and choose a suitable shooting distance based on your skill level. With your homemade backstop, you can focus on honing your archery skills and enjoy countless hours of shooting practice without worries. So, gather your materials, get creative, and construct your personalized archery backstop today!


