

Are you ready to embark on a DIY adventure that will add a personal touch to your living space and provide practical storage solutions? Look no further than easy DIY wall shelves! These versatile and customizable shelves offer a fantastic opportunity to showcase your creativity while elevating the aesthetics of any room. In this comprehensive guide, we will take you through the process of creating stunning wall shelves that are both visually appealing and highly functional.
Table of Contents
- Choosing the Right Materials and Tools
- Step-by-Step Guide: Building Your DIY Wall Shelves
- FAQs (Frequently Asked Questions)
- Conclusion
Choosing the Right Materials and Tools
Before diving into the exciting world of DIY wall shelves, gathering all the necessary materials and tools is important. Here’s a detailed list of items you’ll need:
- Wood boards or reclaimed materials: Choose the type of wood or reclaimed materials that best align with your personal style and budget. Opt for sturdy options that can support the weight of the items you plan to display.
- Measuring tape: Accurate measurements are crucial for ensuring your shelves fit perfectly in your desired space. Use a measuring tape to measure the wall’s dimensions and the shelves’ length.
- Saw: A saw is essential for cutting the wood boards to the desired length and shape. Select a saw that suits your comfort level and the thickness of the materials you’re working with.
- Sandpaper: Smooth out any rough edges or surfaces on the wood boards using sandpaper. This step will give your shelves a polished and professional finish.
- Drill: A drill will be needed to create holes for screws or brackets during installation. Ensure you have the appropriate drill bits for the type of wall material you’ll work with.
- Screws or brackets: Depending on your design and style, you’ll need screws or brackets to attach the shelves to the wall. Ensure they are strong and durable enough to hold the weight of your desired items.
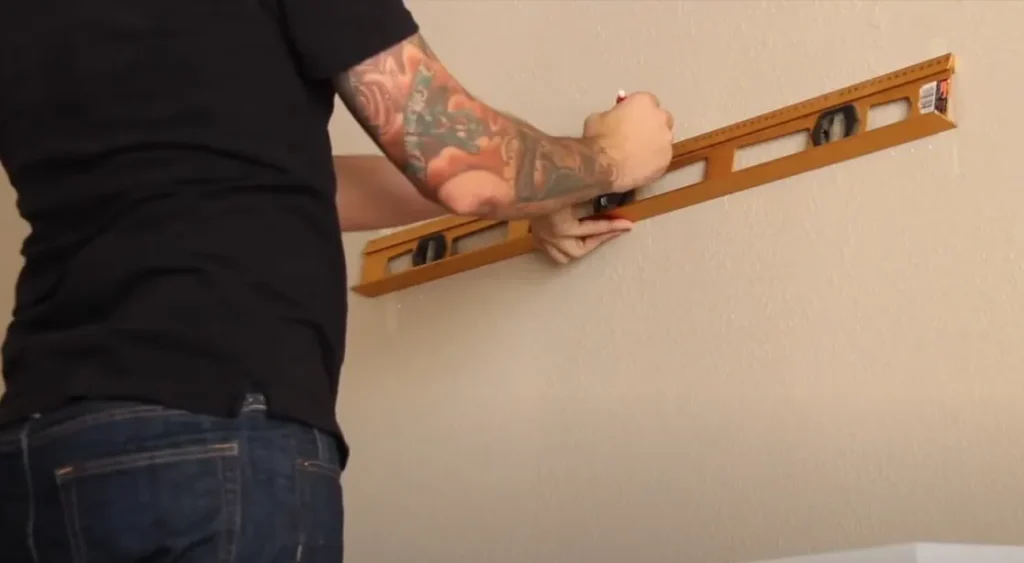
- Level: To achieve a visually pleasing result, it’s important to ensure your shelves are level during installation. A level tool will help you achieve this.
- Paint or stain (optional): If you wish to add a splash of color or a touch of elegance to your shelves, consider using paint or stain. Choose a color or finish that complements your existing decor.
- Brushes or rollers (if painting): If you decide to paint your shelves, make sure you have brushes or rollers suitable for the size of the project.
Now that you have gathered your materials and tools, let’s dive into the step-by-step process of building your DIY wall shelves.
Step-by-Step Guide: Building Your DIY Wall Shelves
1. Planning and Design
Before you start cutting and assembling:
- Take some time to plan and design your wall shelves.
- Consider the purpose of the shelves and how they will fit into your overall decor scheme.
- Measure the available wall space and determine the dimensions that will work best for your needs.
- Sketch out a rough design to visualize the placement and arrangement of the shelves.
2. Material Selection
Based on your design and personal preference, select the type of wood or reclaimed materials that will bring your vision to life. Popular choices include pine, plywood, or even repurposed wooden pallets. Ensure that the materials are of good quality and strong enough to hold the weight of your desired items.
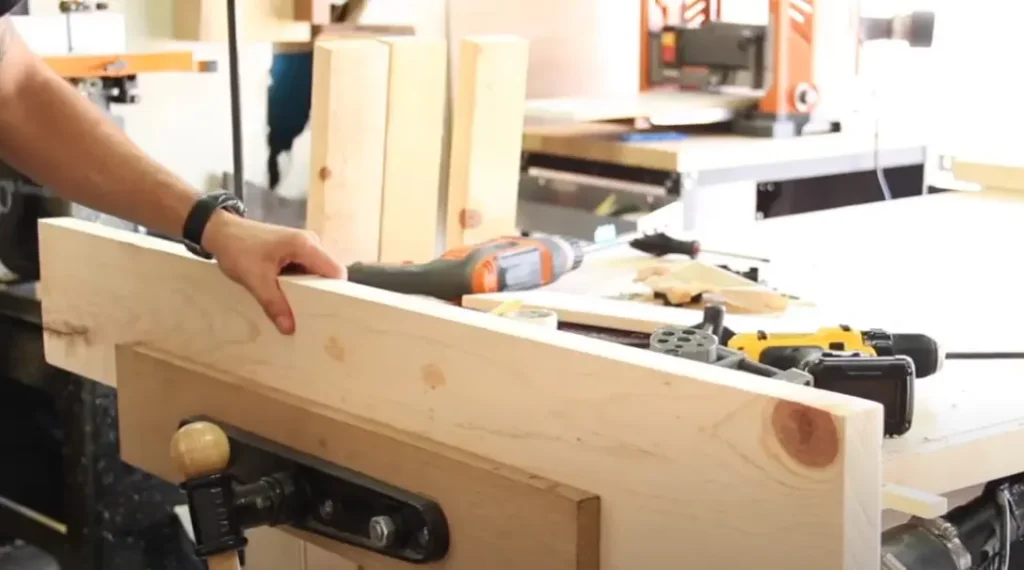
3. Cutting and Sanding
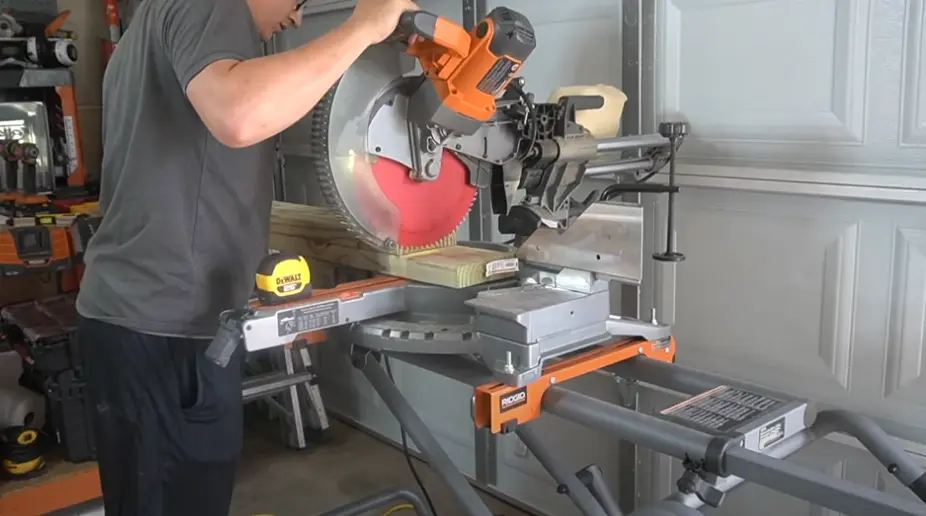
Using the measurements from your design, mark the dimensions on the wood boards or reclaimed materials. Take care in measuring and marking accurately to ensure precise cuts. Once marked, carefully cut the boards using a saw. If using recycled materials, remove any nails or unwanted elements. After cutting, use sandpaper to smooth the edges and surfaces of the boards, giving them a clean and polished look.
4. Mounting the Shelves

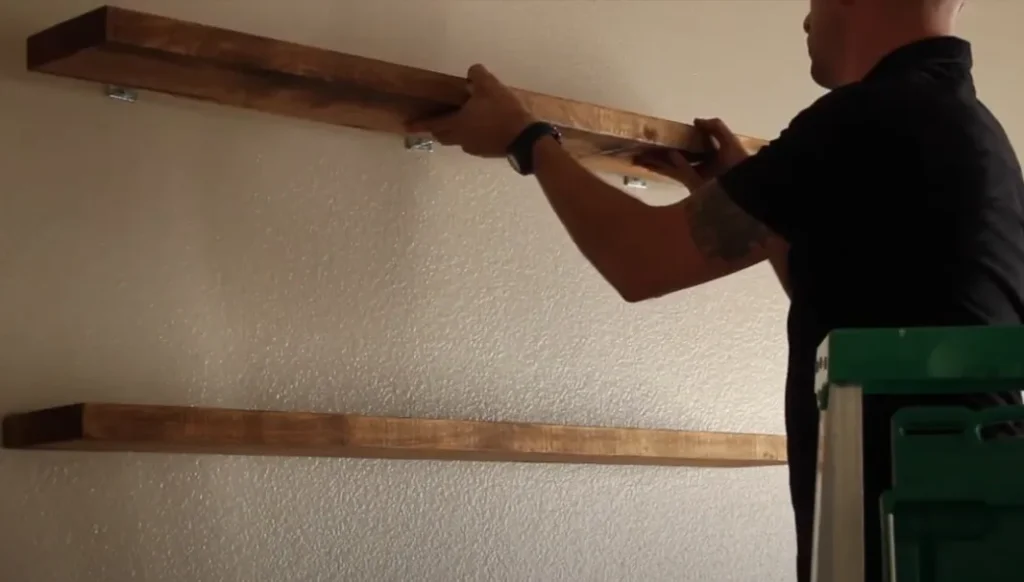
Now comes the exciting part—mounting your DIY wall shelves! Start by deciding the mounting method best suits your design and wall type. One popular option is using brackets for a floating effect. If you prefer a seamless look, you can opt for hidden supports that attach directly to the wall, giving the illusion of shelves floating without any visible hardware. Whichever method you choose, ensuring that the shelves are securely attached to the wall is essential.
Before attaching the shelves, use a level to ensure they will be installed straight and even. Mark the desired position of the shelves on the wall, making sure to account for spacing between each shelf. If using brackets, follow the manufacturer’s instructions for installation, placing them at the appropriate locations. If using hidden supports, carefully attach them to the wall, ensuring they are level and securely anchored.
Once the mounting hardware is in place, carefully position the shelves on top, making sure they align with the markings on the wall. Attach the shelves to the brackets or hidden supports using screws, ensuring a tight and secure fit. Double-check the level of each shelf before moving on to the next.
5. Finishing Touches
To add the final touches to your DIY wall shelves, consider applying paint or stain to match your existing decor or create a statement piece. Before painting, ensure the wood surface is clean and dust-free. Apply the paint or stain evenly using brushes or rollers. Allow sufficient drying time between coats for a flawless finish. For a more rustic look, you may choose to leave the shelves unfinished, allowing the natural beauty of the wood to shine through.
If you want to take your DIY wall shelves to the next level, consider adding decorative elements such as trim, rope accents, or even wallpaper on the back panel. These extra touches will personalize your shelves and make them truly unique to your space.
Idea – Patrick Hosey
FAQs (Frequently Asked Questions)
Q: Can I create DIY wall shelves without prior woodworking experience?
A: Absolutely! Anyone can design and build DIY wall shelves, regardless of their woodworking skills. Start with simple designs and gradually progress to more intricate ones as you gain confidence. Don’t be afraid to experiment and learn along the way.
Q: How do I ensure my DIY wall shelves are securely attached to the wall?
A: It’s essential to use appropriate mounting methods and ensure that your shelves are attached to wall studs or use sturdy anchors for stability. Following the manufacturer’s instructions for brackets or hidden supports is crucial for a secure installation. If you have any doubts, consult a professional or seek advice from experienced DIYers.
Q: Can I personalize my DIY wall shelves?
A: Absolutely! DIY wall shelves offer endless possibilities for personalization. Feel free to experiment with paint colors, decorative elements, and unique shapes to make them truly one-of-a-kind. Let your creativity shine, and make the shelves reflect your personal style and taste.
Q: Are there alternative materials I can use for DIY wall shelves?
A: Yes! While wood is a popular choice for DIY wall shelves, there are alternative materials you can explore. Reclaimed pallets, metal pipes, or repurposed vintage items can add a distinctive touch to your shelves. Just make sure to choose materials that are strong enough to support the weight and securely attach them to the wall.
Conclusion
With easy DIY wall shelves, you can transform your walls into stylish showcases that enhance your space’s aesthetics and provide practical storage solutions. By following the step-by-step guide provided in this article, you’ll be able to create unique and personalized wall shelves that suit your style and meet your organizational needs.
Remember to start with careful planning and design, considering the shelves’ purpose and the available wall space. Choose high-quality materials that can withstand the weight of your desired items and ensure sturdy construction. Take your time during the cutting and sanding process to achieve precise and polished edges.
When it comes to mounting the shelves, select the appropriate method for your design and wall type. Whether you choose brackets for a floating effect or hidden supports for a seamless look, make sure to secure the shelves firmly to the wall, taking into account levelness and proper spacing.
To add that extra touch of personality, consider applying paint or stain to match your decor or create a statement piece. Don’t hesitate to experiment with different colors, finishes, and decorative elements to make your shelves truly stand out.
Lastly, remember to personalize your DIY wall shelves to reflect your unique style. Add trim, rope accents, or even wallpaper to create a customized look that perfectly complements your space.
Remember, DIY wall shelves are not limited to those with extensive woodworking experience. With the right tools, materials, and a dash of creativity, anyone can create stunning wall shelves that combine style and functionality.
So, grab your measuring tape, saw, and paintbrushes, and let your imagination run wild. Start building your easy DIY wall shelves today and enjoy the satisfaction of transforming your walls into beautiful and functional displays of your personal style and creativity.


