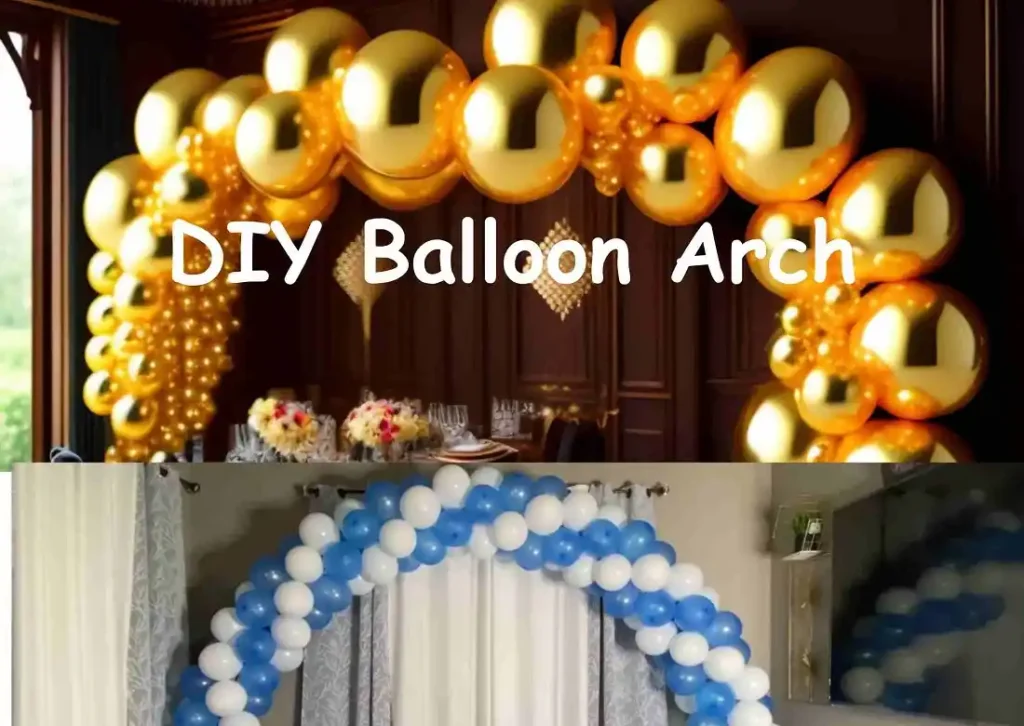
Are you ready to take your party decorations to the next level? If you’re looking for a fun and impressive way to add a burst of color and excitement to your celebrations, a DIY balloon arch is just what you need. Whether you’re hosting a birthday party, baby shower, or any special occasion, a balloon arch is a fantastic focal point that will leave your guests in awe. This comprehensive guide explores the step-by-step process of creating your mesmerizing balloon arch. So, let’s dive in and get ready to unleash your creativity!
Table of Contents
- Materials Needed
- Step-by-Step Guide to Creating a DIY Balloon Arch
- FAQs (Frequently Asked Questions)
- Q: How long will it take to create a balloon arch?
- Q: Can I reuse my balloon arch for future events?
- Q: Can I customize the balloon colors to match my event theme?
- Q: Is it possible to create a balloon arch without a balloon arch kit?
- Q: How can I prevent the balloons from popping?
- Q: Can I add other decorations to my balloon arch?
- Conclusion
Materials Needed
Before we get started, let’s gather all the materials required to bring your balloon arch to life:

- Balloons: Choose various colors that complement your party theme. Aim for different sizes to add depth and visual interest.
- Balloon Pump: A balloon pump is a must-have tool to simplify the inflation process and save you from feeling light-headed.
- Balloon Arch Kit: Invest in a balloon arch kit that includes arch poles, connectors, and bases. This will provide a sturdy structure for your creation.
- Fishing Line or Nylon String: Use this to secure the balloons in place and create the arch shape.
- Clear Tape: It will be handy for attaching the arch to the wall or other surfaces.
- Command Hooks (optional): If you’re planning to hang your balloon arch, command hooks provide a convenient and damage-free solution.
- Decorative Ribbons or Tassels (optional): Add a touch of flair by attaching ribbons or tassels to your balloon arch.
Step-by-Step Guide to Creating a DIY Balloon Arch
Step 1: Preparing Your Balloons

Start by inflating the balloons using the balloon pump. Remember to vary the sizes to achieve a visually appealing effect. Aim for a mix of small, medium, and large balloons to add dimension to your arch. Inflate a generous number of balloons, ensuring you have enough to create a complete and impressive display.
Step 2: Setting Up the Balloon Arch Kit
Assemble the balloon arch kit according to the instructions provided. Connect the arch poles and secure them firmly to the bases. Ensure the structure is stable and ready to support the weight of the balloons.
Step 3: Creating the Arch Shape

Attach the fishing line or nylon string securely to both arch ends. Begin by tying the line to one end of the arch and then gently thread it through the tied necks of the inflated balloons. Continue this process, adding balloons one by one until you reach the desired length for your arch. Be mindful of the color arrangement and maintain a balanced distribution throughout the arch.
Step 4: Securing the Balloon Arch
Once you have completed threading the balloons, secure the fishing line or string tightly to the other end of the arch. Ensure all balloons face forward and the arch maintains its desired shape.
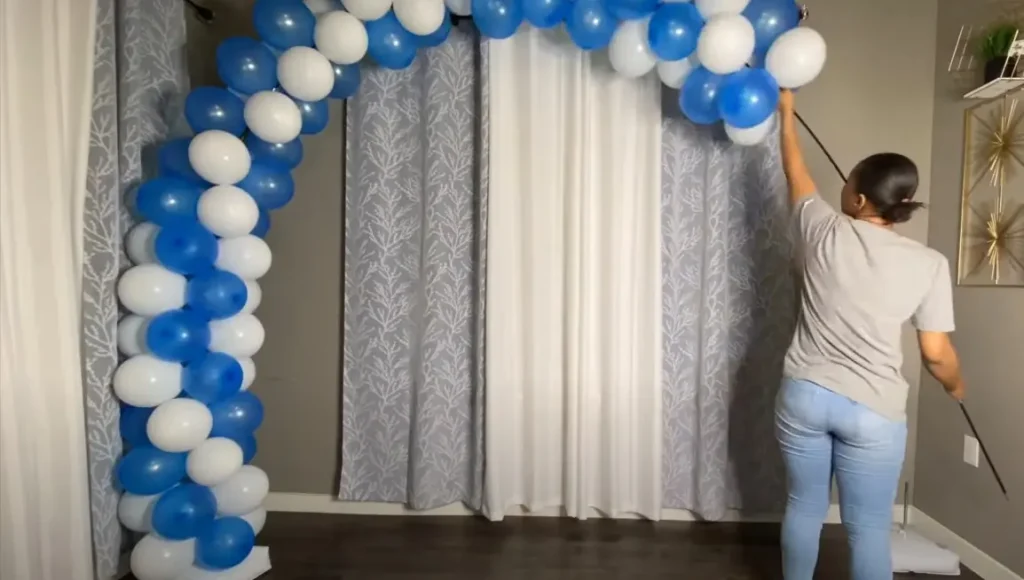
Step 5: Positioning and Decorating the Balloon Arch
Decide where you want to place your balloon arch. If you’re opting for a freestanding arch, position it on a sturdy surface. Alternatively, if you prefer a suspended arch, use clear tape or command hooks to attach it to the wall or ceiling. Take this opportunity to add decorative ribbons or tassels to your balloon arch. Attach them strategically between the balloons, allowing them to cascade down and add an extra touch of charm and movement.
Step 6: Balloon Arch Placement Tips
When deciding where to position your balloon arch, consider the layout of your event space and the focal points you want to highlight. Here are a few placement ideas to spark your creativity:
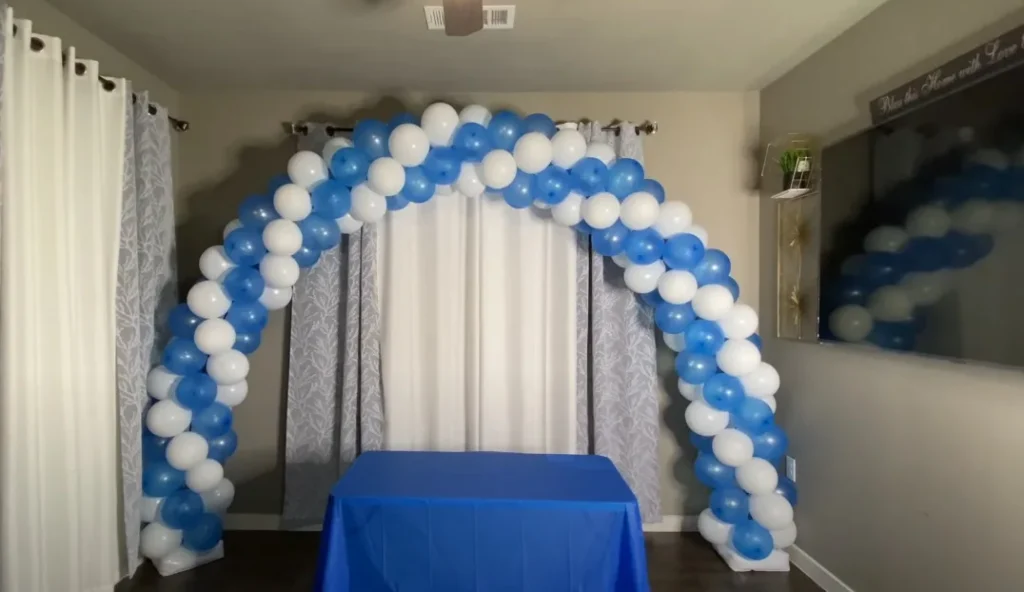
- Entrance Accent: Welcome your guests with a stunning balloon arch at the entrance of your venue. It sets the tone for the event and creates an immediate sense of excitement.
- Photo Backdrop: Position the balloon arch as a backdrop for capturing memorable photos. It provides a colorful and festive setting for guests to strike a pose and create lasting memories.
- Dessert Table Delight: Make your dessert table stand out by placing the balloon arch as a captivating backdrop. It will enhance the visual appeal of your treats and make them even more enticing.
- Dance Floor Highlight: Transform your dance floor into a lively space by placing the balloon arch nearby. It adds a dynamic element to the area and encourages guests to let loose and have fun.
Remember to consider your event’s overall theme and color scheme when choosing the placement for your balloon arch. It should harmonize with the rest of your decorations and create a cohesive visual experience.
Image Credit – ITS.SEUNOLAJIDE
FAQs (Frequently Asked Questions)
Q: How long will it take to create a balloon arch?
A: The time required depends on the size of the arch and your experience level. On average, assembling and decorating a balloon arch can take 1 to 2 hours.
Q: Can I reuse my balloon arch for future events?
A: You can reuse your balloon arch for multiple occasions with proper care and storage. Deflate the balloons gently, dismantle the arch carefully, and store it in a dry and safe place.
Q: Can I customize the balloon colors to match my event theme?
A: Absolutely! Balloons come in various colors, allowing you to customize your balloon arch to suit your event theme perfectly. Get creative and experiment with different color combinations!
Q: Is it possible to create a balloon arch without a balloon arch kit?
A: While a balloon arch kit provides convenience and stability, you can still create a balloon arch using alternative methods. Consider using a sturdy frame, such as PVC pipes or a metal rod, to shape your arch and secure the balloons.
Q: How can I prevent the balloons from popping?
A: To prevent balloons from popping, avoid over-inflating them. Leave some space at the top of each balloon to allow for expansion. Keep the balloons away from sharp objects and direct sunlight, as heat can cause them to burst.
Q: Can I add other decorations to my balloon arch?
A: Absolutely! Feel free to get creative and add additional decorations to your balloon arch. You can incorporate flowers, greenery, or even themed cutouts to enhance the overall look and match your event’s theme.
Conclusion
Now that you have a step-by-step guide to creating a mesmerizing DIY balloon arch, it’s time to unleash your creativity and elevate your party decorations. By following these instructions and adding your personal touch, you can create a stunning centerpiece that will leave your guests amazed. Whether it’s a birthday celebration, baby shower, or any special occasion, the vibrant burst of colors from your balloon arch will undoubtedly set the mood for a joyous and memorable event. So, gather your materials, inflate those balloons, and let your creativity soar as you craft your dazzling balloon arch. Happy decorating!